
What Order to Layer Your Skincare: A Step-by-Step Guide

A well-rounded skincare routine is essential for healthy, glowing skin, and knowing the right order of application makes all the difference. Using natural ingredients to formulate your own skincare allows you to customise each step to your unique needs while avoiding harsh chemicals.
In this guide, we'll walk you through the ideal skincare sequence from cleansing to moisturising, highlighting each step's benefits, offering practical tips, and sharing simple recipes using our premium raw ingredients.
The Golden Rule: Thin to Thick
When layering skincare, the general rule of thumb is to apply products from thinnest to thickest consistency. This ensures that lightweight, water-based products penetrate effectively before sealing them in with richer, oil-based and emulsion-based formulas. Following this correct sequence allows each product to work optimally without interference.
Overview of Your Skincare Routine:
Here’s a quick rundown of the main steps involved in a complete skincare routine:
Step 1: Cleansing
Remove impurities, dirt, and excess oil to prepare your skin to absorb active ingredients effectively.
Step 2: Toning
Balance your skin’s pH and provide hydration while enhancing absorption for subsequent skincare steps.
Step 3: Serums
Target specific skin concerns with concentrated active ingredients, applied directly to freshly cleansed and toned skin.
Step 4: Moisturising
Seal in hydration and active ingredients, strengthening your skin’s protective barrier.
Step 5: Sunscreen (morning only)
Protect your skin daily from UV damage—essential for maintaining long-term skin health and preventing premature ageing.
Additional Treatments: (1-2 times weekly)
- Exfoliation to remove dead skin cells and encourage renewal.
- Face masks for targeted hydration, purification, or nourishment.
- Eye cream to target specific issues around the sensitive eye area.
Now that you have a clear overview, let’s dive deeper into each step!
 Step 1: Cleanser
Start with a gentle cleanser to remove dirt, oil, and impurities from your skin. Cleansing creates a fresh canvas, helping your skincare products penetrate effectively. Selecting the right cleanser for your skin type and concerns sets the stage for healthy, radiant skin.
Here’s a quick rundown of the main types of cleansers, their benefits, and which skin types they suit best:
Gel Cleansers
Lightweight with deep-cleansing abilities, gel cleansers effectively remove excess oil and unclog pores.
Best for: Oily, acne-prone, and combination skin
Why choose it? Balances oil production and targets blemishes with ingredients like salicylic acid or tea tree oil.
Cream Cleansers
Rich and moisturising, cream cleansers gently cleanse without stripping the skin of natural oils.
Best for: Dry, sensitive, and mature skin
Why choose it? Hydrates and nourishes the skin with ingredients like aloe vera, shea butter, or glycerin.
Oil Cleansers & Cleansing Balms
Oil-based cleansers and balms dissolve makeup, sunscreen, and impurities effortlessly. Both provide a gentle yet thorough cleanse without compromising moisture levels.
Best for: All skin types, especially dry, sensitive, and combination skin
Why choose them? Ideal for removing stubborn makeup while leaving the skin soft and hydrated. Particularly beneficial in colder months.
Powder Cleansers
Water-activated powders that create a gentle, customisable cleansing experience.
Best for: All skin types, especially sensitive skin and frequent travellers.
Why choose it? Lightweight, preservative-free, travel-friendly, and gentle enough for sensitive skin. You can control texture and potency simply by adjusting the amount of water used, making them perfect for those who love flexibility in their cleansing routine.
Micellar Water
A gentle, no-rinse cleanser that uses micelles to attract dirt, oil, and makeup.
Best for: All skin types, especially sensitive skin
Why choose it? Perfect for gentle cleansing and quick makeup removal without irritation.
Choosing the Right Cleanser for Your Skin Type:
- Oily/Acne-Prone: Gel or foaming cleansers
- Dry: Cream, oil, or balm cleansers
- Sensitive: Micellar water, cream, oil, or balm cleansers
- Combination: Gel or foaming cleansers balanced with hydrating cleansers like oils or balms
How to Use Your Cleanser:
-
Gel and Foaming Cleansers:
Wet your face with lukewarm water, apply cleanser to fingertips, gently massage into the skin in circular motions, then rinse thoroughly. -
Cream Cleansers:
Apply to dry or damp skin, gently massage in circular motions, then rinse with lukewarm water or remove gently with a soft cloth. -
Oil Cleansers and Cleansing Balms:
Apply to dry skin, massage gently to dissolve makeup and impurities, then emulsify with warm water and rinse thoroughly, or remove with a soft, damp cloth. -
Micellar Water:
Saturate a cotton pad or reusable pad and gently wipe over your skin, no rinsing required. Ideal for quick cleansing or removing light makeup.
Following these simple steps will ensure your cleanser effectively prepares your skin for the products that follow.
DIY Tip: Cleansers are wash-off products designed primarily to cleanse, not to deeply penetrate your skin. Don’t overspend by loading them with expensive active ingredients. Save your powerhouse actives for serums and moisturisers, where they'll make the biggest difference!
Check out our Cleanser recipes HERE
 Step 2: Toner
After cleansing, toning is your next key step. A good toner helps rebalance your skin’s pH, refreshes, and hydrates, prepping your face to better absorb the layers of skincare that follow.
Forget the drying, alcohol-heavy toners of the past. Modern toners (especially DIY ones) are all about gentle, skin-loving ingredients that calm, hydrate, or refine, depending on what your skin needs.
Popular DIY Toner Ingredients
Hydrosols
Hydrosols make an ideal toner base. They’re gentle, water-based distillates that offer subtle aroma and skincare benefits.
All these hydrosols are preservative free and grown and produced spray-free in Aotearoa New Zealand.
- Rose – Deeply hydrating and soothing. Ideal for dry, mature, or sensitive skin.
- Lavender – Balances and calms; great for combination, reactive, or blemish-prone skin.
- Mānuka & Kānuka – Clarifying and gently purifying; well-suited to oily and acne-prone skin.
- Lemon Myrtle – Refreshing and mildly astringent; helps reduce excess oil and refine pores.
- Kawakawa – Supports skin prone to redness, irritation, or imbalance, perfect for sensitive skin types.
Niacinamide (Vitamin B3)
Brightens and evens skin tone, supports the skin barrier, and helps regulate oil. Use at 2–5% in water-based formulas.
Hyaluronic Acid
A powerful humectant that draws moisture into the skin. Excellent in hydrating toners for dry or dehydrated complexions. Use between 0.2%, for a thinner solution, and 1% for a thicker serum-like solution.
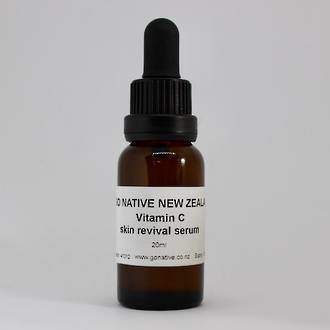
Vitamin C (Ascorbyl Glucoside)
A stable, water-soluble form of vitamin C that helps brighten skin and support collagen production. Use at 2–5% in toner formulations.
Choosing the Right Ingredients for Your Skin Type
- Dry or dehydrated – Rose or lavender hydrosol, hyaluronic acid
- Oily or acne-prone – Lemon myrtle or mānuka hydrosol, niacinamide
- Sensitive or reactive – Kawakawa or lavender hydrosol, aloe vera juice
- Dull or uneven skin tone – Niacinamide, ascorbyl glucoside, rose hydrosol
- Normal or combination – Kānuka or lavender hydrosol, niacinamide
How to Use a Toner
After cleansing, apply toner with a cotton pad, your hands, or a mist bottle. Use morning and night to keep your skin balanced, refreshed, and ready for serums and moisturiser.
Check out our Toner recipes HERE
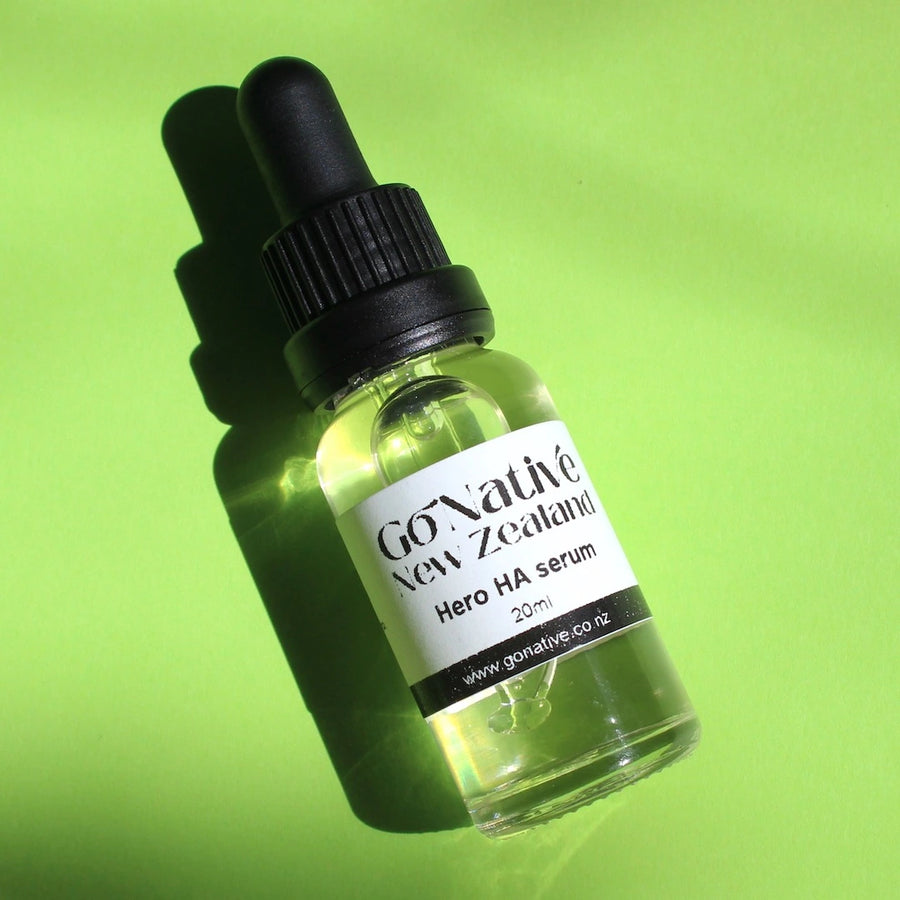
 Step 3: Serums
After toning, serums are your next essential step. These highly concentrated treatments deliver active ingredients deep into your skin, targeting specific concerns and boosting overall skin health.
What Is a Serum?
Serums are specialised formulas designed to deliver targeted, potent ingredients directly into your skin. Applied after cleansing and toning, but before moisturising, serums penetrate deeply to effectively address specific concerns, from hydration and brightening to anti-ageing and calming irritation.
Water-Based vs. Oil-Based Serums:
Water-Based Serums
These lightweight, fast-absorbing serums deliver hydration and active ingredients quickly and effectively into your skin. Popular ingredients include hyaluronic acid, renowned for its powerful moisture-binding abilities, leaving skin plump and hydrated, and niacinamide (vitamin B3), celebrated for balancing oil production, improving skin texture, and reducing redness. Water-based serums are ideal for layering, quickly addressing concerns like dehydration, dullness, or congestion without feeling heavy.
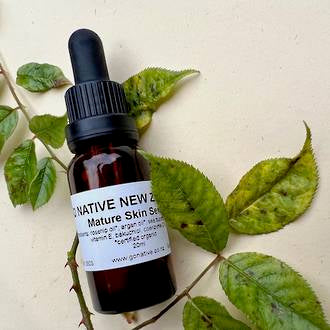
Oil-Based Serums
These richer serums nourish and protect your skin, providing essential fatty acids, antioxidants, and vitamins. With ingredients like rosehip, jojoba, and argan oils, they support the skin barrier, lock in moisture, and offer long-lasting hydration. Oil-based serums are excellent for replenishing the skin’s lipid barrier and enhancing the delivery of active ingredients. Ideal for dry, sensitive, or mature skin types, they offer deep nourishment without clogging pores.
Here’s a quick overview of popular serum types and their key benefits:
Hydrating Serums (Usually Water-Based)
Deliver instant hydration, plumping and smoothing the skin. Essential ingredients include hyaluronic acid and glycerin.
Brightening Serums (Water or Oil-Based)
Boost radiance and reduce dark spots with ingredients like vitamin C, niacinamide, and botanical extracts.
Anti-Ageing Serums (Often Oil-Based)
Support skin elasticity and reduce signs of ageing with nourishing ingredients like retinol, peptides, bakuchiol, and antioxidant-rich plant oils.
Exfoliating Serums (Typically Water-Based)
Clear pores, smooth skin texture, and brighten the complexion using AHAs (glycolic acid) and BHAs (salicylic acid). Use 2–3 times weekly.
Calming or Anti-Redness Serums (Water or Oil-Based)
Soothe and reduce redness with gentle botanicals such as chamomile, calendula, or centella asiatica.
Antioxidant Serums (Water or Oil-Based)
Protect skin against environmental damage using ingredients like vitamin C, vitamin E, and green tea extract.
How to Use Serums:
After cleansing and toning, apply your water-based serum first. Gently pat or press a few drops into your skin until absorbed. Follow up with your oil-based serum if using one - warm a few drops in your fingertips (or drop directly onto skin for less product waste) and press gently into your skin, allowing each serum to fully absorb before applying your next product.
By understanding these differences, you can layer your serums effectively, enjoying the benefits each has to offer.
Check out our Serum recipes HERE
 Step 4: Moisturiser
After applying serums, it's essential to lock everything in with a moisturiser. Moisturisers help seal hydration and active ingredients into your skin, creating a protective barrier to keep it soft, smooth, and supple.
Why Moisturise?
Moisturisers reinforce the skin barrier, prevent water loss, and protect your skin from environmental stressors. Regular moisturising maintains hydration, reduces dryness and irritation, and helps your skin stay resilient and healthy.
Cream-Based Moisturisers (Emulsions): Why They're the Favourite
Cream-based moisturisers (emulsions) are the most versatile and widely used in skincare formulation, thanks to their balanced blend of water and oil phases. They deliver deep hydration and nourishment while maintaining a comfortable, non-greasy feel, making them suitable for almost all skin types.
For skincare formulators, emulsions offer endless possibilities to customise and innovate. Because emulsions combine both oil and water-soluble ingredients, formulators have tremendous flexibility in creating products that target specific skin concerns, textures, and sensory experiences. This type of moisturiser is where skincare formulation can become truly creative, allowing the incorporation of powerful active ingredients like antioxidants, botanical extracts, humectants, and more, tailored precisely to individual needs.
Why Choose Cream-Based Moisturisers?
- Flexible Formulation: Ability to incorporate diverse ingredients for targeted results.
- Optimal Hydration: Combines hydrating humectants with nourishing emollients for balanced, effective moisture delivery.
- Versatile for All Skin Types: Easily customised for dry, normal, sensitive, mature, and combination skin.
Other Types of Moisturisers for Comparison:
Gel Moisturisers:
Lightweight hydration ideal for oily or acne-prone skin.
Balms and Facial Oils:
Deep nourishment and protection suited to very dry or mature skin types.
Key Ingredients to Include in Cream Moisturisers:
- Hyaluronic Acid: Deep hydration, instantly plumps and smooths skin.
- Glycerin: Effective humectant that helps maintain hydration levels.
- Niacinamide: Balances oil production, brightens complexion, and supports barrier function.
- Shea Butter: Nourishes deeply, locking in moisture without a heavy feel.
Choosing the Right Cream Moisturiser for Your Skin:
- Dry or Mature Skin: Rich creams with nourishing oils, shea butter, or humectants for deep hydration.
- Normal or Combination Skin: Medium-weight creams providing balanced hydration without heaviness.
- Sensitive Skin: Gentle, fragrance-free emulsions with calming botanicals and barrier-supportive ingredients.
How to Use Moisturiser:
After cleansing, toning, and applying your serums, gently massage your moisturiser into the face and neck using upward strokes. This final step locks in moisture and active ingredients, leaving your skin nourished, protected, and prepared for your daily routine or overnight renewal.
Check out our Moisturiser recipes HERE
 Step 6: Sunscreen
As the final step in your skincare routine, sunscreen is essential for protecting your skin from harmful UV rays. This crucial layer helps prevent premature ageing, sunburn, hyperpigmentation, and even skin cancer. Always choose a broad-spectrum sunscreen with SPF 30 or higher, applying it last in your routine for maximum protection.
Why Sunscreen is Essential
Sunscreen shields your skin from UV radiation, which causes significant damage—even on cloudy days or indoors near windows. Daily application helps preserve your skincare benefits and keeps your skin youthful and healthy.
Types of Sunscreen:
1. Chemical Sunscreens
Description: Contain ingredients (e.g., avobenzone, oxybenzone) that absorb UV rays and convert them into heat, which is released from the skin.
Pros: Lightweight, invisible finish, easy application.
Cons: Can cause irritation, especially for sensitive skin.
2. Physical (Mineral) Sunscreens
Description: Use zinc oxide or titanium dioxide to physically block UV rays, sitting on the skin surface.
Pros: Ideal for sensitive skin, immediate protection, broad-spectrum coverage.
Cons: May leave a white cast, especially on darker skin tones, can feel heavier.
Why You Shouldn't Make Your Own Sunscreen
While skincare formulation can be highly rewarding, sunscreen is the one product best left to professionals. Sunscreens require rigorous lab testing and precise formulations to reliably deliver protection from UV rays. Homemade sunscreens cannot be accurately tested for SPF or broad-spectrum protection, potentially leaving your skin vulnerable to damage.
For a detailed look at why sunscreen formulation requires professional expertise and rigorous testing, we encourage you to read our dedicated blog:
Why You Shouldn’t Make Your Own DIY Sunscreen
Sunscreen Application Tips:
- Apply generously, about one teaspoon for the face and neck.
- Reapply every two hours, or immediately after swimming, sweating, or towel-drying.
- Don’t forget often-missed spots like ears, neck, and backs of hands.
- Always apply sunscreen as the final step in your skincare routine, before makeup.
By incorporating sunscreen daily, you’ll protect your skin's health, help to preserve its youthful appearance, and ensure all your carefully applied products deliver their best results.
Additional Steps to Elevate Your Skincare Routine
Once you've nailed the basics of cleansing, toning, serums, moisturising, and sunscreen, you may consider adding these extra steps to further boost skin health and enhance your self-care routine.

Exfoliation
Regular exfoliation enhances your skin’s texture by removing dead skin cells, promoting cell turnover, and revealing smoother, brighter skin. Aim to exfoliate 1–2 times per week, adjusting frequency based on your skin’s tolerance and the exfoliant chosen.
Physical Exfoliators:
Gentle, manual scrubs (e.g., sugar or coffee grounds) effectively remove dead skin cells through mild abrasion. Suitable for normal to oily skin types, use gently to avoid irritation.
Chemical Exfoliators:
Using AHAs (glycolic, lactic acids) or BHAs (salicylic acid), these exfoliants dissolve dead cells without physical abrasion. AHAs are ideal for dry, mature skin, while BHAs penetrate deeper, making them excellent for oily, acne-prone skin.
How to Use:
Exfoliate once or twice weekly after cleansing and before toning. Adjust the frequency based on your skin’s sensitivity and chosen exfoliant to prevent over-exfoliation.

Eye Cream
The delicate skin around your eyes often requires special care due to its thinness and sensitivity. Eye creams are specially formulated to address specific concerns, such as puffiness, dryness, or fine lines.
Benefits:
Typically formulated with hydrating ingredients like hyaluronic acid, peptides to firm and smooth, and caffeine to reduce puffiness.
How to Apply:
After applying serums, gently dab a small amount around your orbital bone using your ring finger. Avoid rubbing or pulling the delicate skin, instead pat lightly until absorbed, then follow with your moisturiser.

Face Masks
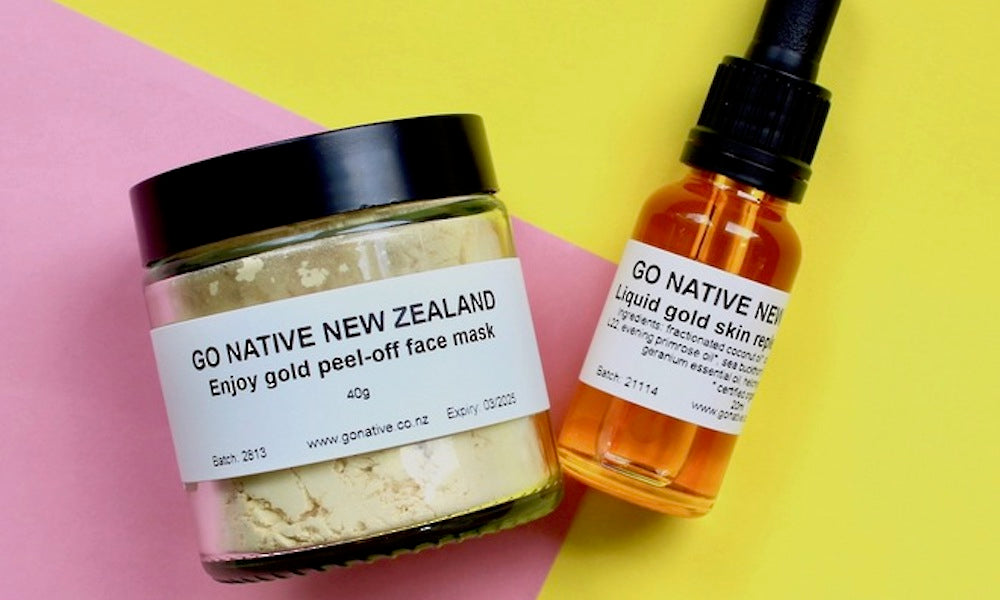
Face masks are a luxurious and effective way to address specific skin concerns or simply to give your skin an extra boost of nourishment. Incorporate masks 1–2 times per week as part of your evening skincare routine.
Clay Masks:
Made from natural clays (kaolin or bentonite), these masks help absorb excess oil and impurities, clarifying your complexion and reducing congestion. Ideal for oily, combination, or congested skin.
Benefits: Clarifies pores, reduces excess oil, and soothes irritation, especially when paired with calming botanicals like chamomile or lavender.
How to Use:
Apply after cleansing but before toning. Spread evenly, avoiding the eye area, and allow to sit for 10–15 minutes before rinsing thoroughly with warm water.
In Conclusion
We know this can all sound like a lot, but truly, consistency is what matters most. If you only have time (or energy!) for one or two steps, start there. Work backwards if you like. Start with sunscreen. Then maybe add in a carrier oil you love (Rosehip, Jojoba, or Barbary fig seed oils are all beautiful options) and use it morning and night.
Skincare doesn’t have to be complicated. Our aim is simply to give you a clear, no-fuss path for what goes where, when and why. Build from there, in your own time.
And we totally get that not everyone has time to DIY their own skincare. If you're after a shortcut, scroll to the bottom of the page to check out some of our ready-made options, like high-performance serums, organic moisturisers, and reef-safe sunscreens. Or our Skincare Essentials Box is a great jumping off point!
We hope it helps.
Arohanui,
The Go Native NZ Team


Leave a comment